Build a Form page with entries

To create a Form page that shows entries for a specific Form, first follow the instructions to create a Form page on the Build a Form page. When you get to Form layout options, read this page for more information.
Entries layout options

The layout options Entries in list and Entries in grid will display the form entry data rather than the form itself. This makes the data consumable by a specific audience, rather than displaying a completable form.
List layout will display a table with the form entries in each row, that can be sorted by columns. The initial sort is determined by the first column that is not an image or file type column, and may be alphabetical or numeric.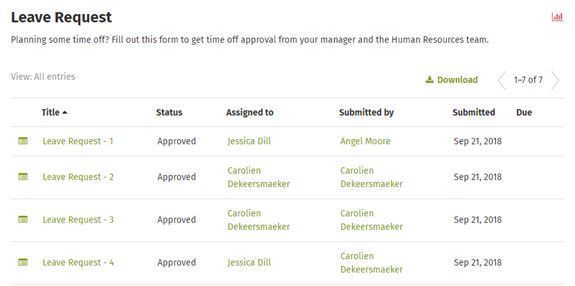
Grid layout uses cards, displaying one card per piece of form entry.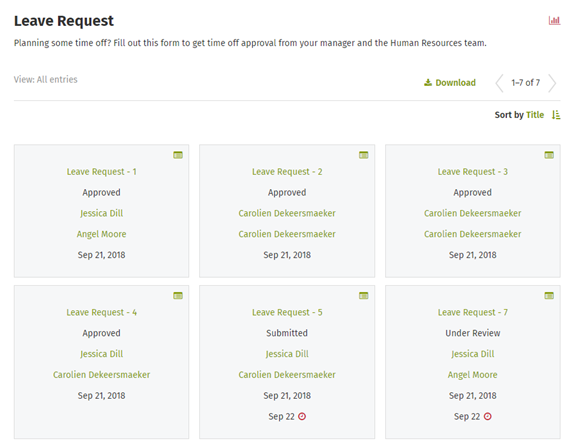
No matter which layout you choose, there are defaults that you can adjust according to your needs:
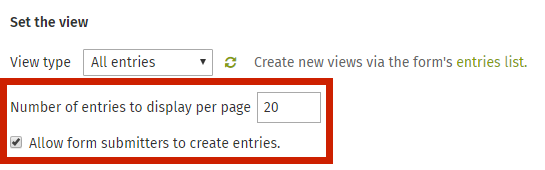
- The View type defaults to displaying All entries, but you can select other views from the dropdown menu, such as displaying only Open entries, or only Overdue entries.
- The number of displayed entries defaults to 20, but you can increase or decrease the number to suit your data presentation needs.
-
Next, there is an option to allow form submitters to create new form entries. By default, this option is not selected. If you want to allow end users to add form entries, check the box. When it is checked, it will display a “Create entry” link in the form.
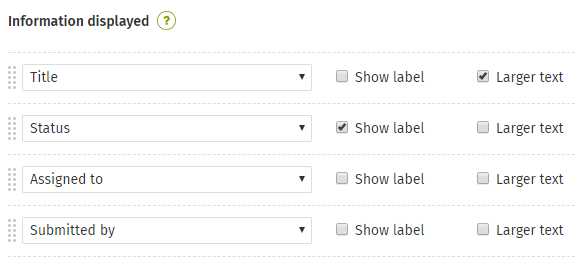
- Title
- Status
- Assigned to
- Submitted by
- Date submitted (Form entry creation date)
- Due date
These Information displayed fields can be adjusted by selecting other available options (including other form fields used on the form) from the dropdowns. The fields can also be reordered by drag-and-drop, or removed altogether.
When viewing entries on the page, they will be sorted by the contents of the first column that is not an image or file field type. Depending on the first column content, the entries will be sorted alphabetically, numerically, or by date - newest first.
Grid layout has a few information options that List layout does not:
- Every field will have a "Show label" checkbox.
- By default this is not checked. Checking it will display a label for the field in the form entry card.
- Every field except an Image upload field will also have a "Larger text" checkbox.
- By default this is not checked. Checking it will use larger text in the form entry card.
- Image upload fields will have a fill/fit toggle.
- Selecting fill will crop the image so that it fills the entire image area on the form entry card.
- Selecting fit will resize the image so the entire image is diplayed on the form entry card.
- Images uploaded to an Image upload field will be displayed in the form entry card.
- Clicking the image will open the image in a new tab.
- Images uploaded to a File upload field will not be displayed. Instead the filename will be listed in the form entry card.
- Clicking the filename will download the image.
Form entry filters

Any fields (with the exception of Time and File Upload fields) that are added to the Information Display will be treated as Filters available on the left side when viewing Form entries. Here are some basic rules on how the Filters behave:
- Any fields already being used in the current view (that was set in edit mode) are excluded since they are already being used as a filter (The status field is an exception to this rule).
- Text, Paragraph, Number, Email, and Website fields show a search box for you to type in.
- Submitted by and Assigned to fields display names with counts and are ordered with the person with the highest count first. If users have the same count they are ordered alphabetically. Up to 10 users are displayed at a time, if there are more than 10 users, a search box is displayed.
- Dropdown, Radio, and Checkbox fields show the selected options with their counts. They are ordered by the choice with the highest count first or, if multiple choices have the same count they are listed alphabetically.
- Date fields show the date display picker.
- Status fields show the different workflow statuses with counts. They are ordered by highest count first, or if multiple statuses have the same counts they are ordered alphabetically.
- If a status field is used in the view, it will also show up as a filter category.
- Only statuses that are related to the status field should be displayed. For example, if the current view is Open entries then all initial and in progress statuses will be displayed as filters. If the current view is Closed entries then only final statuses would be displayed as filters.
- If there is only 1 status that can be used as a filter then the status filter will be hidden. For example, if there is only 1 open status (the initial status) then the status filter will be hidden.
Create a page that shows the Form and its entries
These instructions explain how to create a Form page that displays and allows users to submit a Form, with a Form Card on it that displays existing Form entries. It is also possible to create a Form page that displays the entries, with a Form Card that allows users to submit the Form.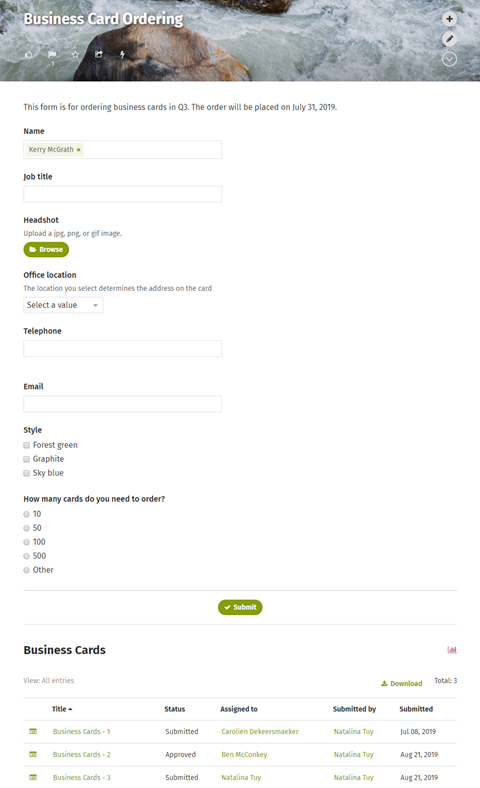
First, create a Form page
These steps display the actual Form on the page and allow users to create and submit a Form entry from the page.
- Navigate to where you want to add a page, and click Add.
- Select the Form content type.
- Under Find a form, start typing the name of the Form you want to add in the Search box, and select it when it appears in the dropdown.
Second, add a Form Card to the page
These steps add a Card to the page that will display existing Form entries on the page.
- In edit mode on the page, click on Set up cards on the right.
- In the Update cards window, click Modify template.
- Add a new card to the page by clicking on the + button in whichever column you want the form results to display.
- Select the Form card from the cards on the right.
- Click on Set up for the Form card that you added in the previous step.
- Under Find a form, start typing the name of the Form you want to add in the Search box, and select it when it appears in the dropdown.
- Select the layout that you would like to use for displaying the results. Choose from either the Entries in list or Entries in grid layout.
- Choose which information should appear for the form's results by changing the Set the view and Information displayed options.
- Click Update in the Form set up window.
- Click Done in the Update cards window.
- Click Publish.
Once the above steps have been completed, users will be able to submit the form and review the results of the form on the same page.
Comments
0 comments
Please sign in to leave a comment.