Reorder and move files

Use these instructions to move files and change the order they appear in on a page. There are various sort options for reordering files. You can sort files by curated order, title, type, date created, last updater, or size.
Sort files in different ways
On the top right of a document library, you will see a word indicating how the files are currently sorted. Available sort options are:
- Curated: a sort order set by a page editor or admin (See Curated sort order below)
- Title: file title
- Type: file type
- Date: date created
- Updater: name of last person to update file
- Size: file size
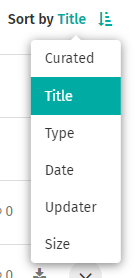
Click on the current sort option to open a menu of sort options. Click on the sort option that you want and the files will automatically re-sort. All sort options (except Curated) are available in standard and reverse orders. Click on the arrow to the right of the sort options to reverse the sort.
To learn how to reorder images on a gallery page, see how to add a photo gallery.
Curated sort order
Page editors and administrators can curate files or folders on a page into a particular order, and this curated order is the default that will display for users that visit the page. A curated order can provide an ease of access or use for certain files that may not be achieved by the other available sort orders. Users can still select a different order in which to view the files, even if a curated order has been set.
Curate a document library
- Find the document library you want to curate.
- Click ... beside the Sort by menu.
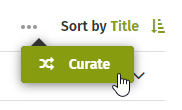
- Click Curate in the menu that opens.
- In the Curate files and folders window, drag and drop files and folders into a new order.
- You can click on the ... menu that appears when you hover over a file or folder and select Move to the top or Move to the bottom to bounce a file or folder to that place in the order.
- You can also click on (Sort by) Curated at the top of the window, and then choose to set the Curated sort by Title or Date.
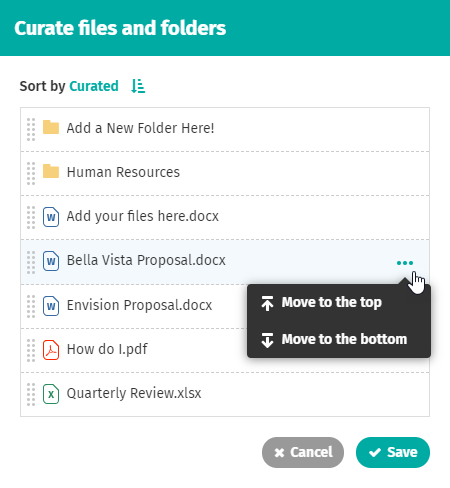
- Click Save. The document library will now display in the Curated order.
Curate a folder
- Find the folder you want to curate.
- Click the down arrow to the right of the folder name.
- Click Curate. (Depending on the column width, the Curate action may be found be clicking the ... menu.)
- In the Curate files and folders window, drag and drop files and folders into a new order.
- You can click on the ... menu that appears when you hover over a file or folder and select Move to the top or Move to the bottom to bounce a file or folder to that place in the order.
- You can also click on (Sort by) Curated at the top of the window, and then choose to set the Curated sort by Title or Date.
- Click Save. The folder will now display in the Curated order.
Remove curated order
When you remove the curated order, users will see the document library in their preferred sort order.
- Find the document library you want to remove the curation for.
- Click ... beside the Sort by menu.
- Click Delete curation in the menu that opens. The document library will revert to your preferred sort order.
To delete curation of a specific folder, click the down arrow to the right of the folder name and click Delete curation. (Depending on the column width, the Delete curation action may be found be clicking the ... menu.)
Move a file
Use these instructions to move a file to a different page, or into a folder. These instructions also work for moving a folder to a new location.
- Navigate to the page the file is on.
- Click the down arrow on the far right of the file name to open the File Controls.
- Click Move under the file title. The Move pop-up window will open. The breadcrumb for the Current Location of the file shows near the top of the window. Once you select a location to move the file to, the breadcrumb of the New location will also show below the Current Location. To choose a new location for the file:
- Click the triangle to the left of a page/folder to show or hide its subpages/files.
- Click on any page/folder listed in the pop-up to move your file there. OR
- Start typing the title of the page/folder that you want to move the file under in the Search field. Click on the page/folder you want when it appears in the dropdown.
- Click Move. You will be taken to the page where the file is now located.
Comments
0 comments
Please sign in to leave a comment.