Add a group page
How to create a new group page
Use these instructions to set up a group page where team members can share information and collaborate. A group page includes members, group email capability, the option to enable a group news card and all the standard collaboration features of ThoughtFarmer intranet pages. Profile pages show a list of groups that a user belongs to.
Select Group content type
- Navigate to the page where you want to add a group and click the Add button (plus icon) in the page header.
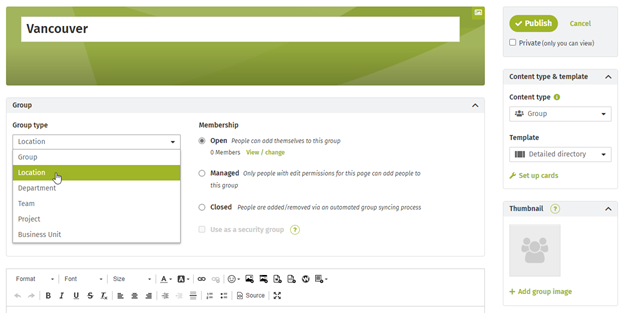
- In edit mode, click the Content type dropdown on the right and select the Group content type. When you do this, several new options will appear on the page.
- Type a descriptive name for the group in the Enter a title box.

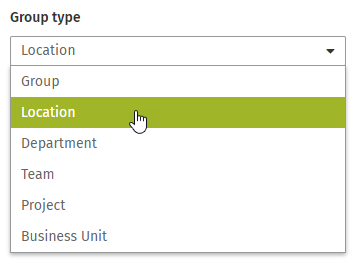
- Select the most appropriate Group type from the dropdown list on the left (see below for an explanation of group types).
- Select either Open or Managed for the membership type (see below for an explanation of membership types).
- Add group members, starting with yourself. See complete instructions on How to add and remove group members (including how to sync group membership with an external security group, with help from your intranet administrator).
- (optional) Set up a News card in any column if you want to have news on the group page that will feed into the homepage news of group members. (To learn more, see How to set up News on group pages.)
- (optional) Set up other cards that are available on the template you choose. (To learn more, see How to set up cards on a page).
- Continue editing or click Publish at the top of the page.
Difference between "Open" & "Managed" membership
On a group page you can either allow anyone to join the group with just a click or you can control exactly who the members are.
- Open - anyone can join: When membership type is set to Open anyone who can view the page can join by clicking the Join group button on the group page. Members can leave the group by clicking Leave group on the group page.
- Managed - edit permission required to add/remove members: When membership type is set to Managed members can only be added or removed by people who have edit permission for the group page.
- Closed - membership is synced with an external security group: Closed membership can only be set up by an intranet administrator. When membership type is set to Closed, membership is synchronized with an external user store (eg. Active Directory) security group. Changes to the group in the external user store will result in automatic changes to the group membership.
Managed and Closed membership can be used to create security groups
Group membership does not control or extend security settings by default, but group membership can be used to grant security permissions. To learn more see, see Use group membership as security.
Group types enable searching people & groups
Group types are categories of groups, with some common group types being Group, Location, Department, Team, Project, Business Unit. These six group types are included in your ThoughtFarmer intranet by default, but your intranet administrator may have changed them or added others.

The People Directory & Groups Directory use Group types as search filters. By selecting the right type for your group you ensure it will show up under that category in relevant search results.
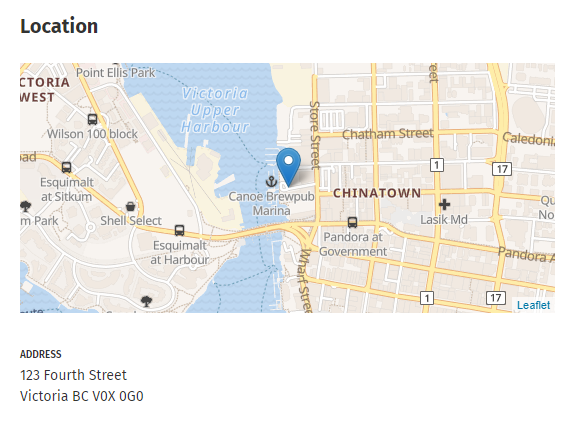
Add a Location card to help people find your office
A Location card on your group page is where you can add your group's physical address and contact info. You can even add a map showing your location in a few simple steps. Colleagues visiting from out of town can find their way to your office by viewing the map on the office group page.

- Go into edit mode on the group page.
- Click Set up cards under Content type & template on the right. The Update cards pop-up window will open.
- Find the Location card section and click Set up below it (or the gear icon on the right of it).

- In the Location pop-up window, enter the address and contact info you wish to display in the Location card.
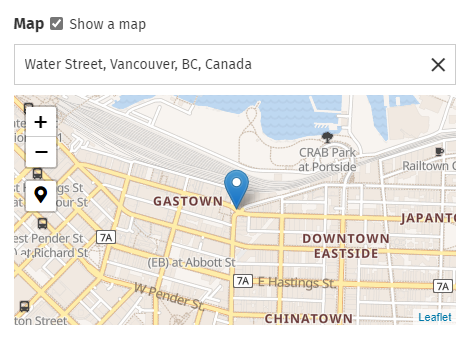
- (Optional) If you want to display a map of the office location, select the checkbox Show a map. To select what the map displays:
- Start typing the address in the Enter an address field, and select it when it appears in the dropdown menu, OR
- Click the pin icon on the left to have the map display your current location (you may have to give the browser permission to use your location), OR
- Click and drag to move to the correct area on the map,
- Zoom in and out using a scroll wheel or the plus and minus buttons on the map.

- Click Done at the bottom of the Location pop-up window.
- Click Done at the bottom of the Update cards window.
- Click Save at the top right.
If you don't see a Location card in the Update cards pop-up window, talk to your intranet administrator about making the Location card available for you to use.
The size and scope of your Location card map will depend on the layout of your page and the size of the device it is viewed on.
Learn more:
Hot intranet tip!
Tag your group page so people can find it
Colleagues may come looking for your group in order to find information they need or to connect with group members. Add tags with useful keywords to your group landing page so people can find your group more easily.
Ask yourself this question to come up with good tags: What words would I use to search for this group page six months from now?
For every word or phrase you might use to search for the group, add a tag to the group landing page.

Comments
0 comments
Please sign in to leave a comment.