Page settings overview
Learn about page settings
On this page, you'll find instructions for how to add a page summary, how to add a short title, how to set a page archive date and how to change the page owner. You'll also find links to detailed instructions about other page settings. Page settings are found on the right of the Rich Text Editor on desktops.
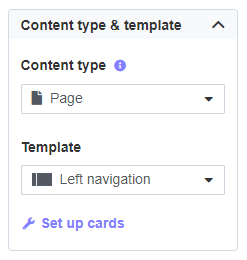
How to choose a content type and page template
The content type and page template you choose determine the purpose, layout and available Cards for the page. See Learn about content types and Learn about page templates.
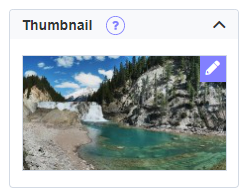
How to add a Thumbnail image
The Thumbnail image for a page displays with the page title in search results, News posts, News Carousel posts, Grid navigation sections and on the Group Directory. See How to add a Thumbnail image.
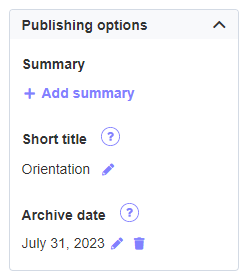
Publishing options section
The Publishing options section of the Page settings has three parts - page Summary, Short title and Archive date.
How to add a page summary
A page summary appears below the page title in search results and in some section page layouts, and also appears as a summary description of News, Blog or Forum posts that appear in your homepage News or other News sections. Writing a page summary will give your readers a quick idea of the contents of your page.

- In edit mode, click Add summary in the Publishing options section. The Summary pop-up window will appear.
- Type the summary in the Rich Text Editor in the Summary window.
- Click Done.
Add summary will change to Edit summary indicating that you have added a summary. Click Edit Summary if you want to make changes to the summary.
To remove the summary, click Edit summary, delete the summary from the Rich Text Editor in the Summary window, and click Done.
How to add a short title
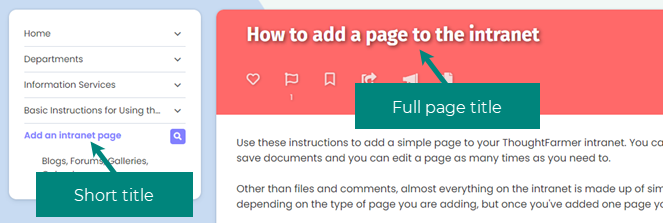
Use these instructions to create an alternate abbreviated title for a page. This shorter title replaces the page's full title in the SuperNav, section page directories, and breadcrumb trails on the intranet. The full page title will show up in search results and will show at the top of the page when people navigate to it. Abbreviated titles help the navigation look cleaner and simpler and reduce the length of breadcrumb trails.
- In edit mode, click Add short title in the Publishing options section.
- Type the short title in the text box that appears.
- Example: For a page titled "How to insert links", you could type in "Insert links" as the short title.
- Press the Enter key or click outside of the text box. The short title you have entered will show under the Short title heading.
Set Archive date to create an "expiry date" for content
The Archive date section under Publishing options allows you to set a date when the content will be archived. Archived pages are content that is not currently relevant to most users of the intranet. Users can choose in their personal settings to show or to hide archived content. You might set a page with details on a company social event to archive after that event has happened. Keep in mind that if you set a date for a page to archive, any pages below it will also be archived on that date.
If an auto archive rule has been applied to the page above the page you are editing, you will see the scheduled archive date set by that rule under Publishing options in edit mode. You can opt the child page out of the auto archive rule by selecting its own archive date.
To add an archive date:
- In Edit mode, click Set archive date in the Publishing options section.
- In the calendar that appears, use the arrows on the left and right to navigate to the month you want, and click on the day that you want the content to archive.
- The date you have selected will show under the Archive date heading.
To edit the archive date, click on the date or the pencil icon on the right, find the new date in the calendar, and click on the date.
To remove the archive date, click the edit icon (a pencil) on the right of the archive date, and then click the garbage can icon that appears on the right.
For more information on archiving, see How to archive content.
How to change Security permissions
You can change Security permissions both in edit mode, and while viewing a page. Security settings determine who can view your page and who can edit your page. To learn more, see how to change security permissions.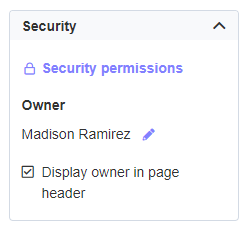
How to change the page owner
Use these instructions to change the person listed as the owner of a specific page. Every page and file on your intranet is attributed to someone, usually the person who created the page or uploaded the file. You can easily change the page owner; however, only the page owner or a person with edit permission on the page can change the page owner.
- In Edit mode, click the name of the current page owner in the Security section. The Change owner pop-up window will appear.
- Click the X on the right of the text box to remove the current owner's name.
- Put your cursor in the text box and start typing the new page owner's name.
- Click on the new owner's name in the dropdown menu that appears.
- Click Done. The new owner's name will now appear under the Owner heading in the Security section.
To learn how to change the page owner without being in edit mode, see How to change the page owner.
How to add tags to the page
Tags are like search keywords you can add to a page that help make your page easier for you and others to find. To learn more, see How to use tags.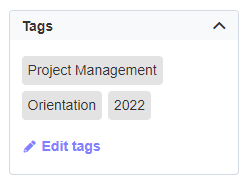

Comments
0 comments
Please sign in to leave a comment.